Do you have an older home with a paver pathway that's too small, outdated, or just not functioning well? Here's how to easily upgrade for something far more pragmatic and aesthetically appealing! Don't get stuck with someone else's plan. Come watch as I figure out how to make a paver walkway with STIHL tools.
Home Improvements Worth Making
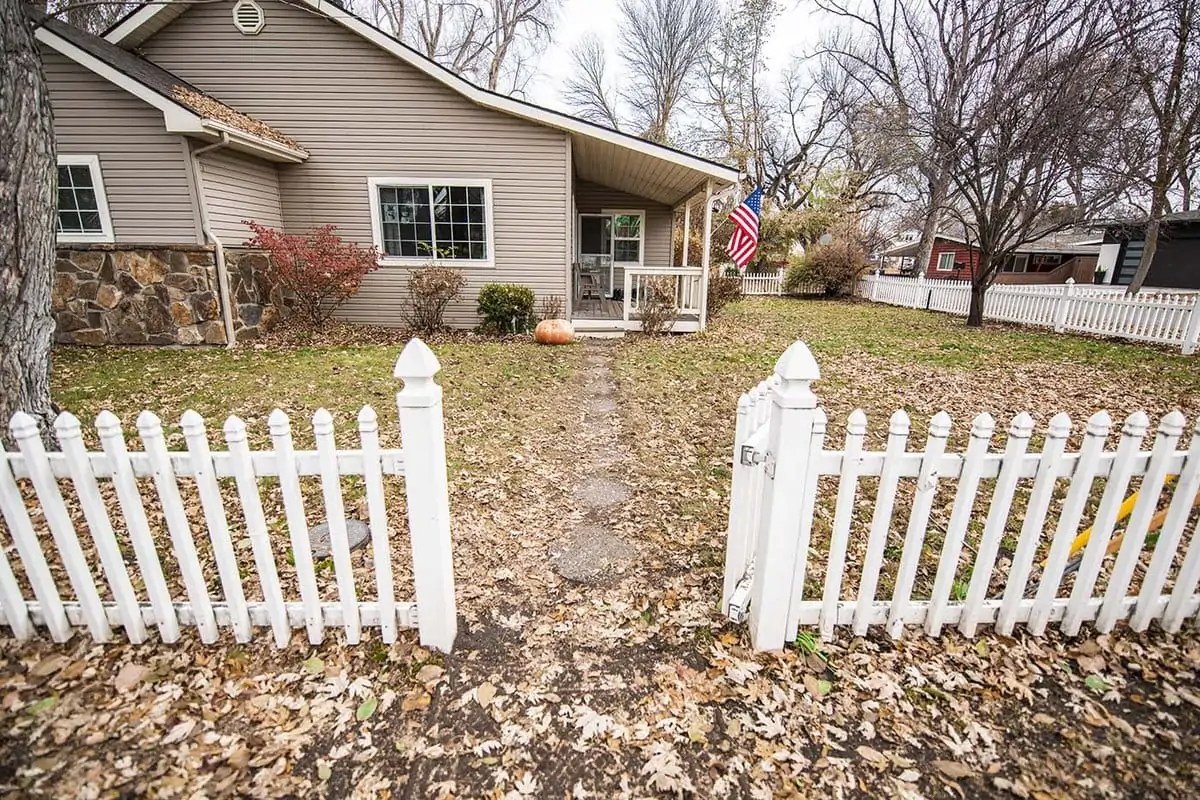
We just bought this home that was built in 1940, and we absolutely love it. However, it was turned over to us with a small pathway built from round pebble pavers. Cute, but not super functional for our busy family of six. Whenever water falls from the sky, the ground and leaves all around them turn into mulch. Because the stones are so small, that mud gets ALL over our shoes and eventually into the house.
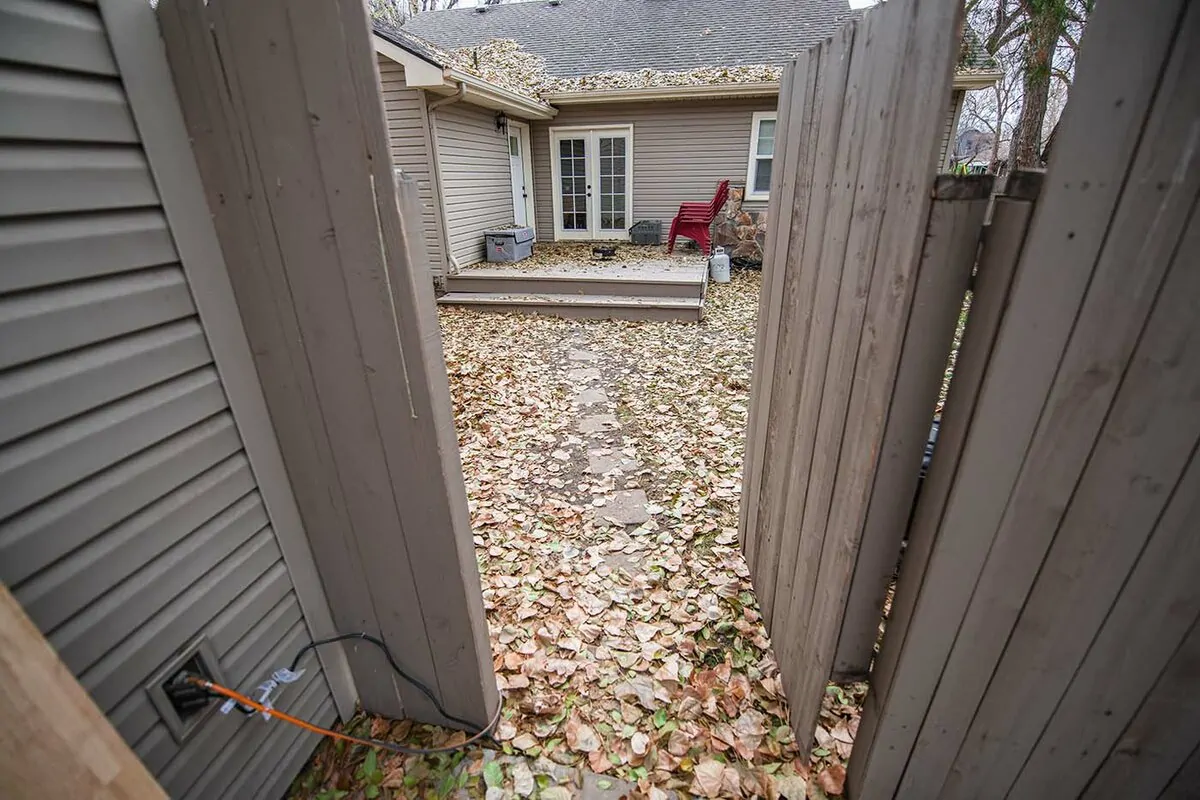
The front entrance is one of two in need of some serious updating. Based on the fact that these pavers don't seem too old, the pathways appear to have been designed around folks who don't come in and out of their home a zillion times a day like we do. We actually bought this place from a really nice retired contractor. MAJOR bonus in buying from a contractor is that there are tons of outlets everywhere you could possibly need them, and he vaulted the heck out of the living room ceiling!
Anyway, if I had to guess what the deal was with these little pavers, he probably made a last-minute “upgrade” to make the house more sellable in a competitive market. Fair enough, but we need this walkway to be highly-functional. It needs to be capable of handling four boys, their many friends, and ALL of their gear in the four dramatically-different seasons that we get here in Boise.
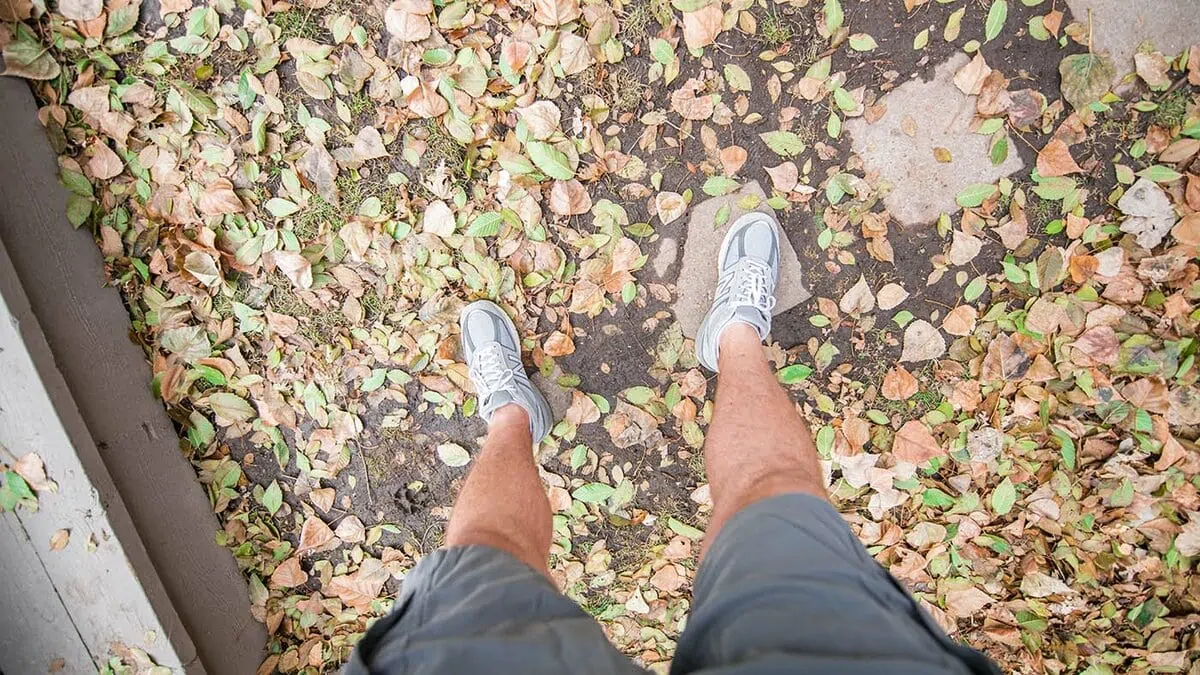
There was no apparent use of paver sand in either the front or back walkways that we inherited. Each side of the walkway was just mud. They were all laid in a spaced-out, semi straight line without the appearance of much prep work.

With our four little boys, a dog, two cats and even two ducks (who aren't allowed inside but somehow occasionally make the visit), this house stood NO CHANCE at staying remotely clean in a drizzle. Chelsea and I loved the cute charm of a paver walkway rather than a concrete sidewalk, so we needed to find a way to update and improve things.
Either that or get really used to mopping. Constantly.
Choosing New Pavers
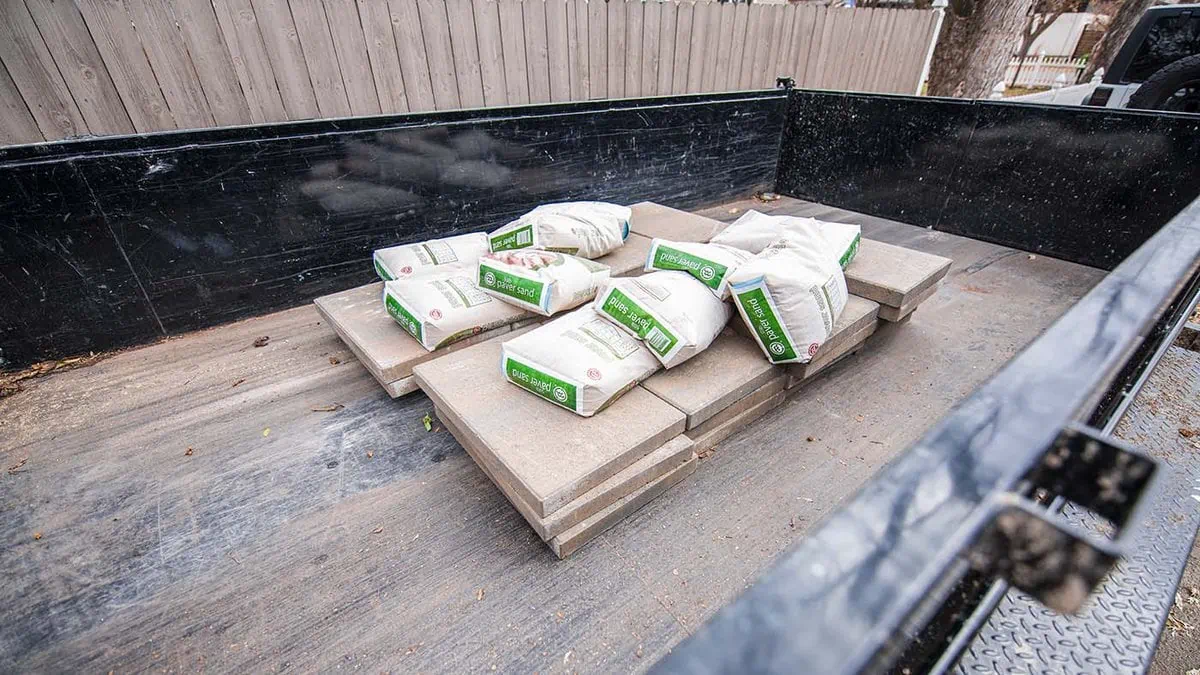
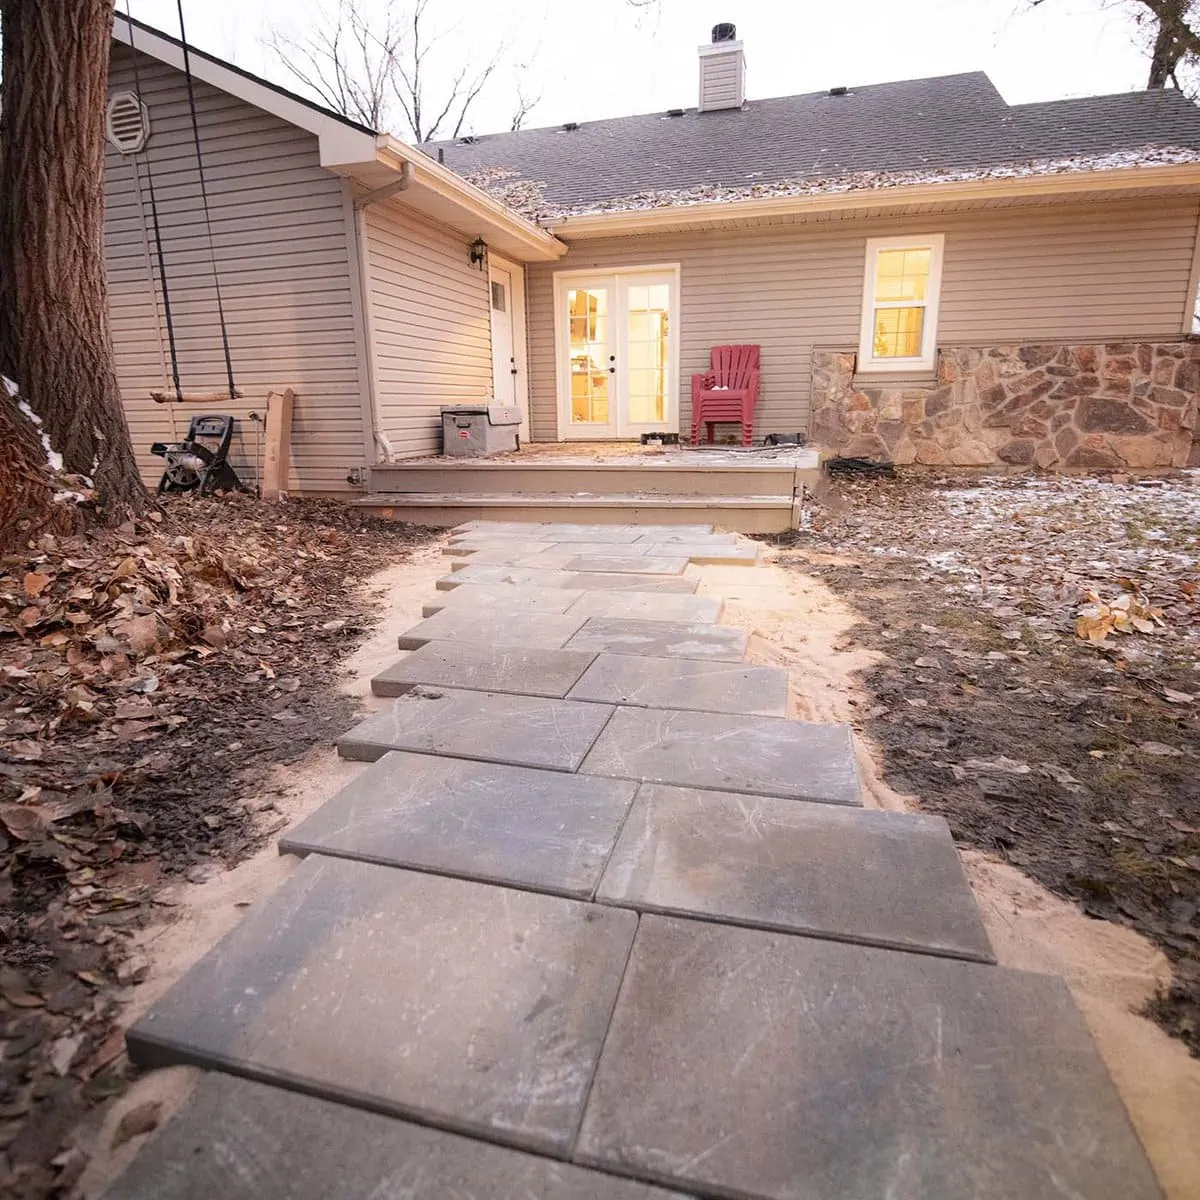
The first task at hand was deciding what size and style of pavers we wanted to upgrade to. After some thought, I chose something that is simple enough to use a push broom to sweep up – and large enough that we won't have to struggle to stay out of the dirt. I chose 16″ x 24″ smooth slabs to make a solid paver base.
Removing Old Landscaping

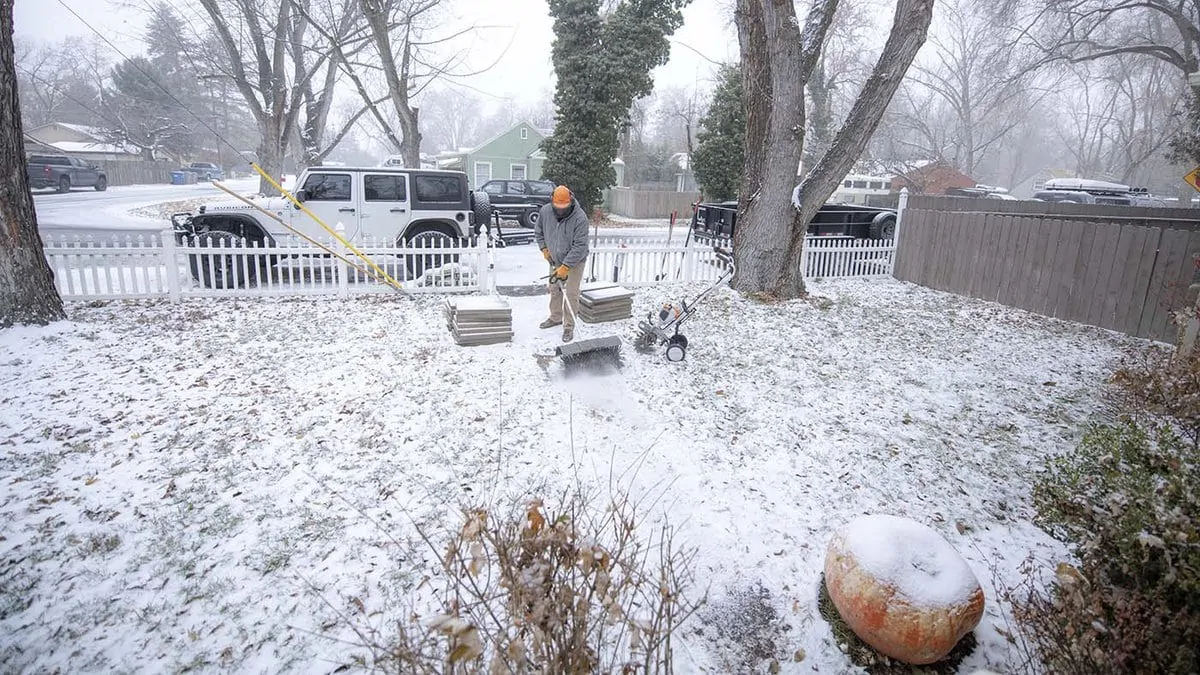
The next step was removing the old pavers to make room for the bigger, better sets. I considered salvaging the dated round pavers and smaller squares, but soon realized I didn't have the room to store them and would probably never use them. I implemented a pick to pry them up from the cold hard ground!
Cutting a New Path
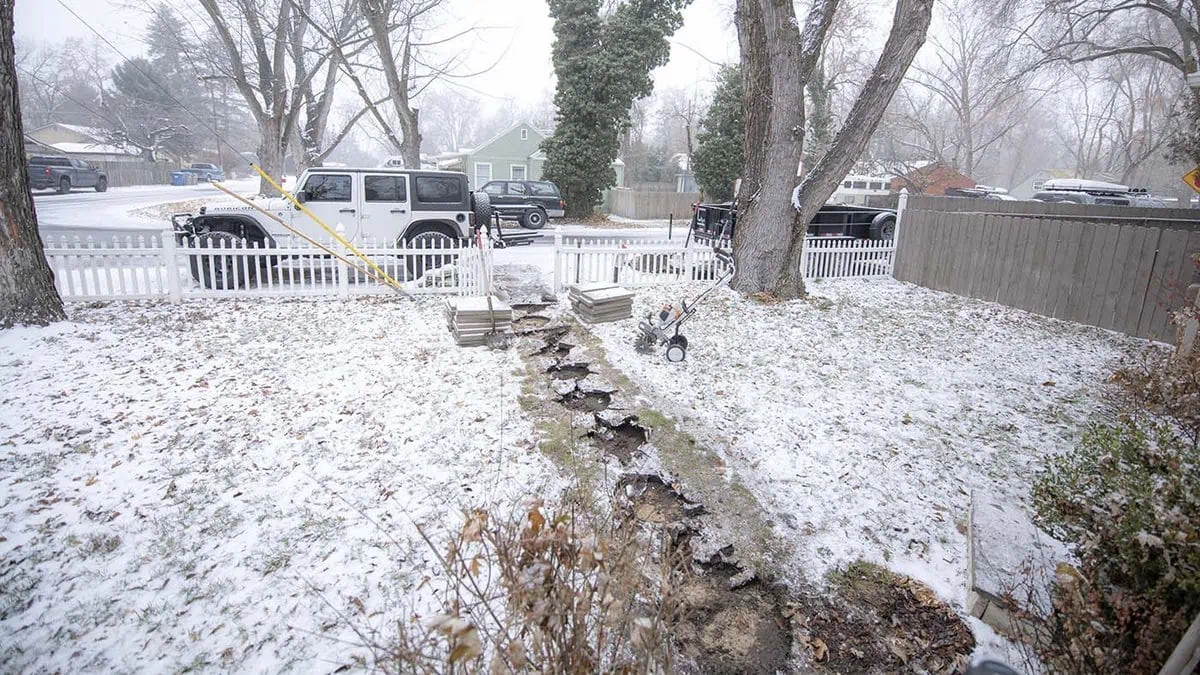
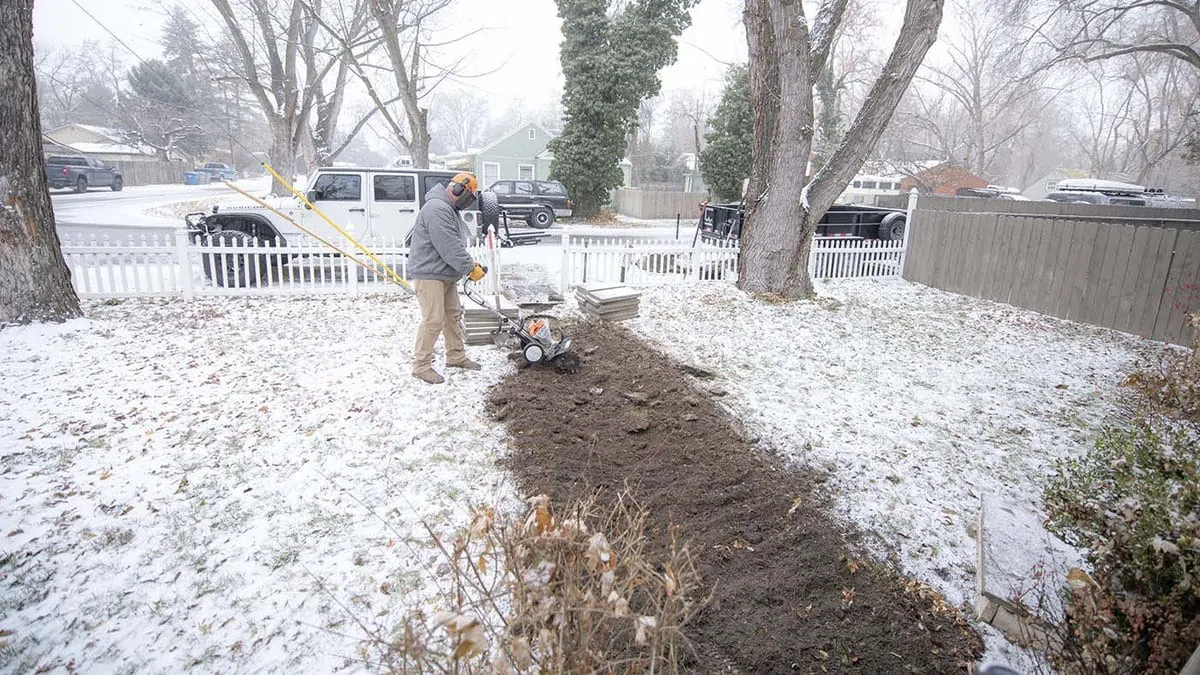
Because of the cold weather, I chose to break out my trusty STIHL MM 56C, which I used at our previous house to make an amazing space for my backyard smokers. Not only is this tool fantastic at tilling an area for a garden, it also works perfectly when cutting straight lines. This great tool made quick work of cutting up and softening my new path.
Creating a Paver Base
One thing to note when learning how to make a paver walkway is that you want to level the ground as much as practically possible. After that, you will use paver sand to help fill in the ground gaps and uneven areas. This makes placing pavers easier, as they will sit more level and won't shift on unseen root or rock.

Some people like to use a gravel base, but I felt like that would wind up leading to a future mess. Remember, we have little boys running around, always looking for something to toss at squirrels! I also chose large pairs of concrete paver stones, since it would be painstaking work to set up brick pavers. I knew that STIHL cut off machines would make very easy work of some angles I wanted to cut.
Placing New Pavers
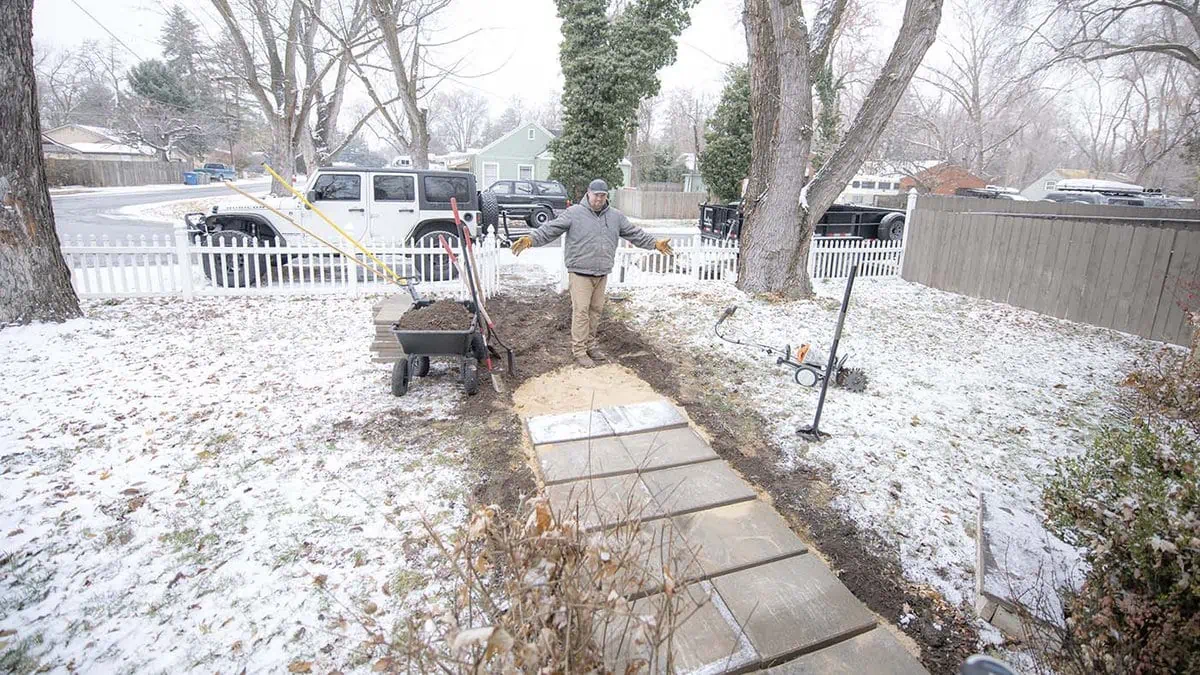
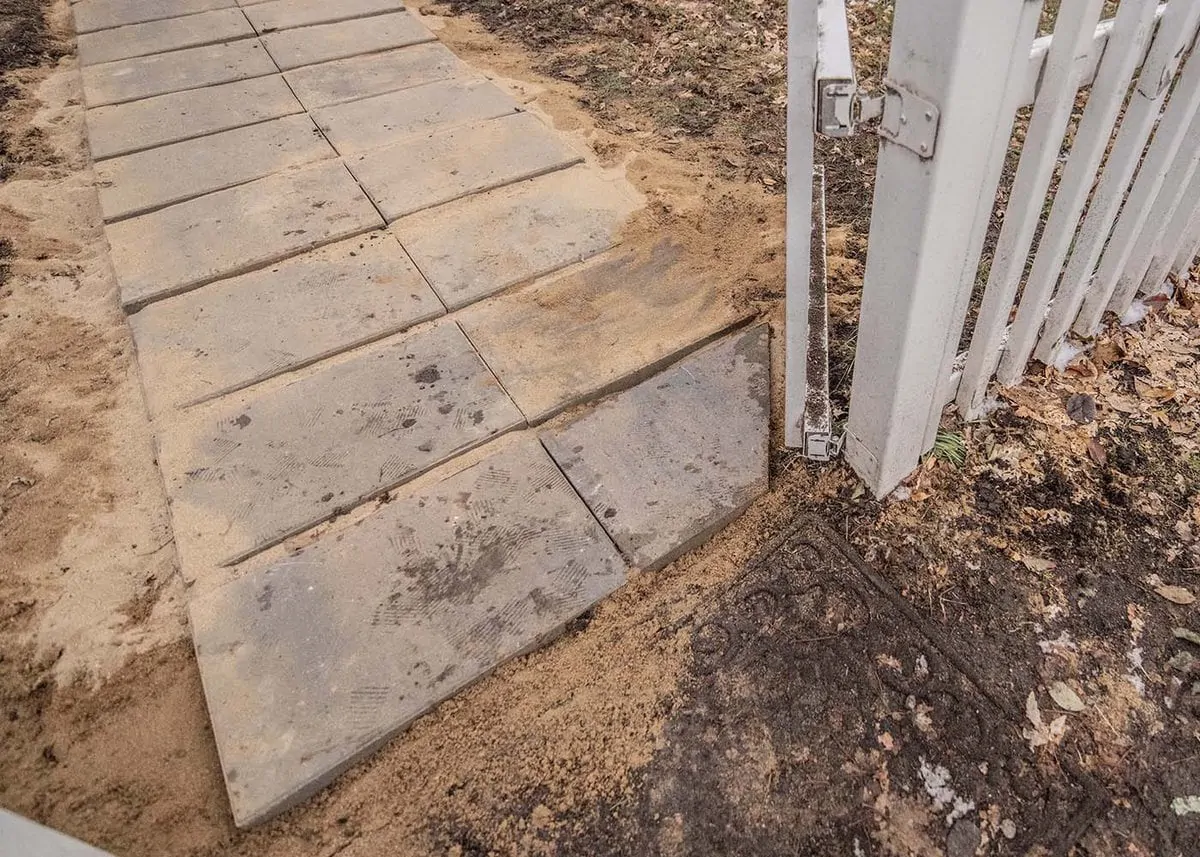
Once the ground has been cut to accommodate the new path and the sand has been hand tampered (you don't really need a plate compactor), it's time to lay down the good stuff. Because these pavers are large and I am already cutting them about an inch or so down into the ground, I decided to put a two-inch gap between each one. This allows there to be a visible space between them that I can easily fill with excess sand or later clear out and replace with small gravel.
Cutting New Pavers
The front pathway to the house was pretty easy, as it was a straight line from the gate to the house. However, when it came to the gate, there was no way I was going to be able to fit a whole paver under the hinge point. So, I knew I would have to make a cut but needed the right tool for the job.
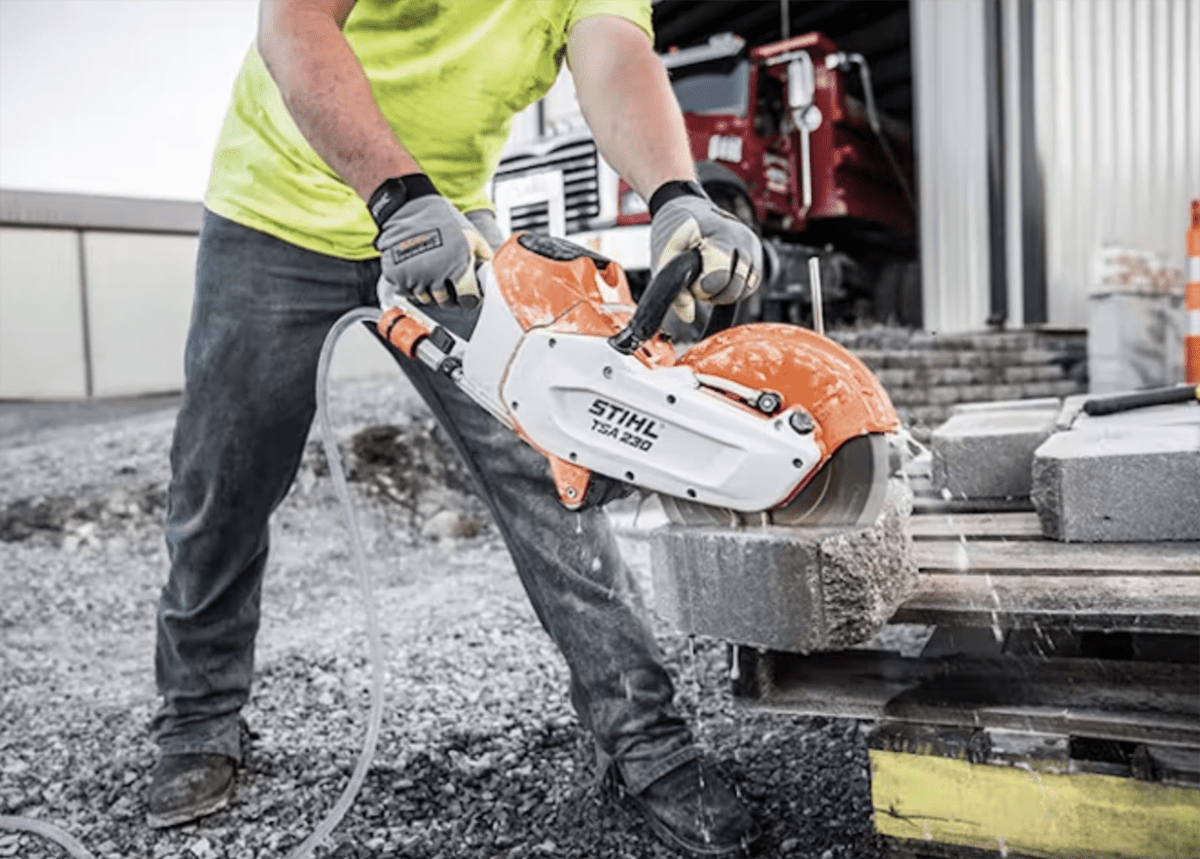
I recently picked up this fantastic STIHL TSA 230 battery powered cutoff machine after loving the gas powered STIHL TS420 that I used while building my floating Alaskan Yellow Cedar deck. I've come to love the STIHL battery powered tools I've had, and figured with our new “quieter” neighborhood, it makes sense to pick up a machine that could do the same awesome work with far less noise. No need to even worry about pulling a cord to start, and I wouldn't need to buy fuel!
Like all STIHL Cut-off Machines, the TSA 230 is recommended for professional users only. For
more novice folks, I recommend consulting a professional for other options.
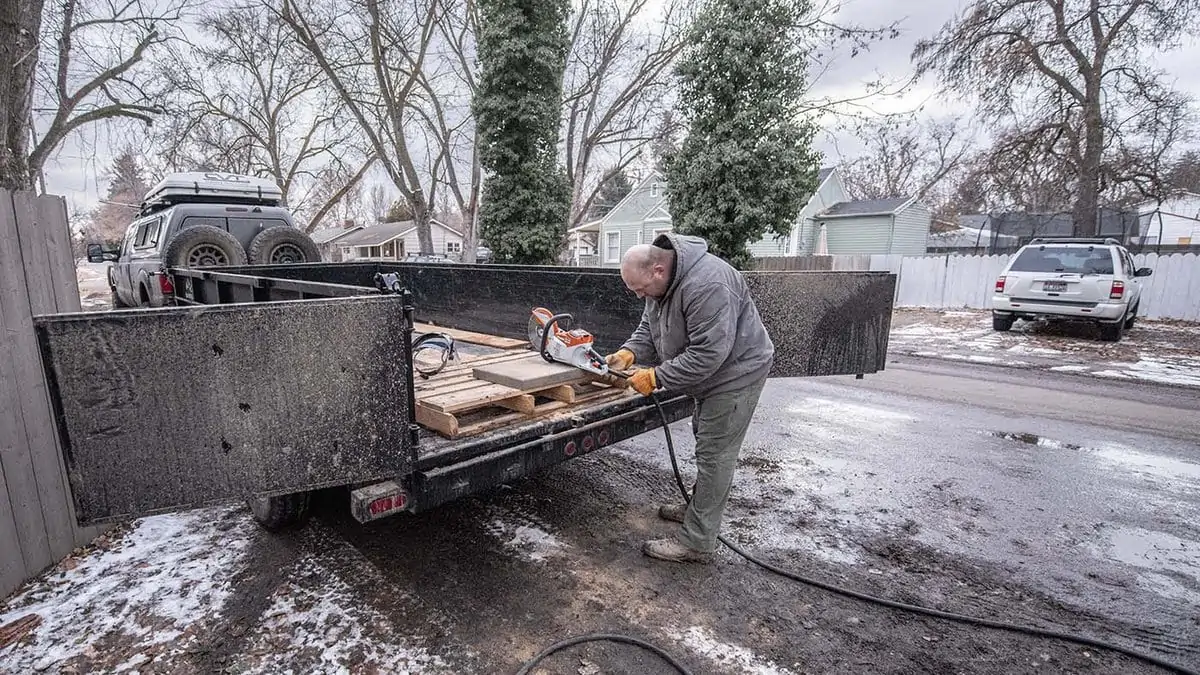
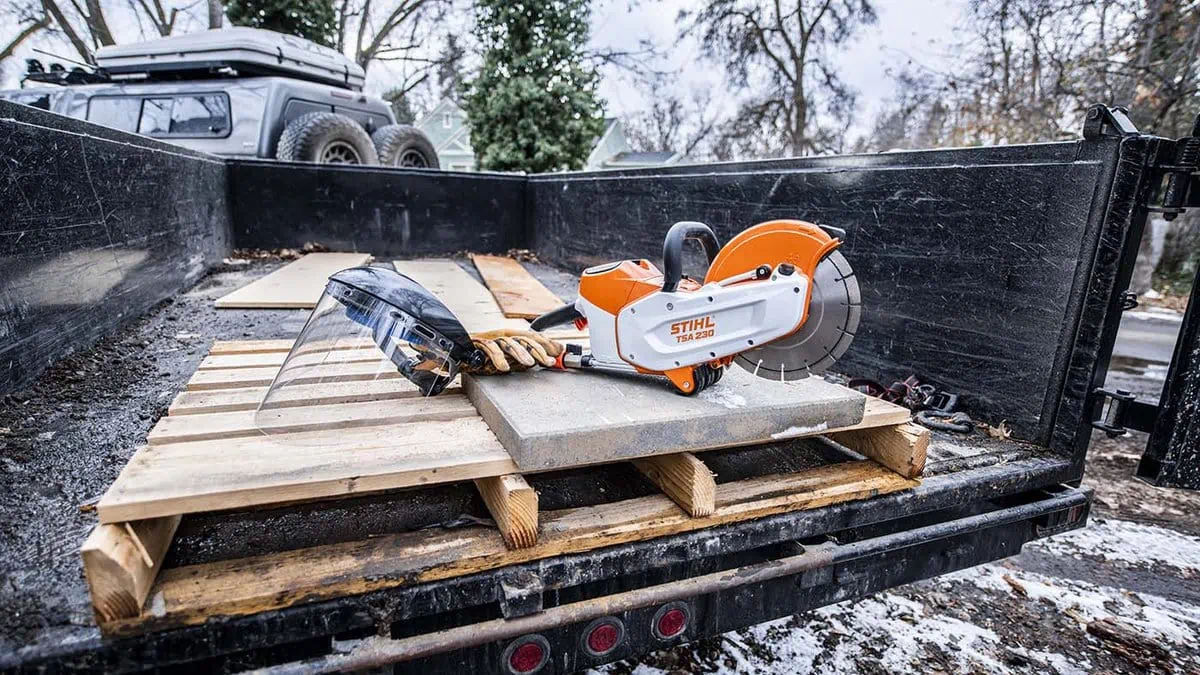
With that all taken into consideration, I chose to lay my pavers straight from start to finish since I had the ability to cut them to the exact size and dimensions I wanted. I put on my safety glasses, face shield, and foamies for ear protection before setting to work at my sawhorse cutting station. I used my dump trailer and a spare wood pallet to hold the paver in place as I made my cuts.
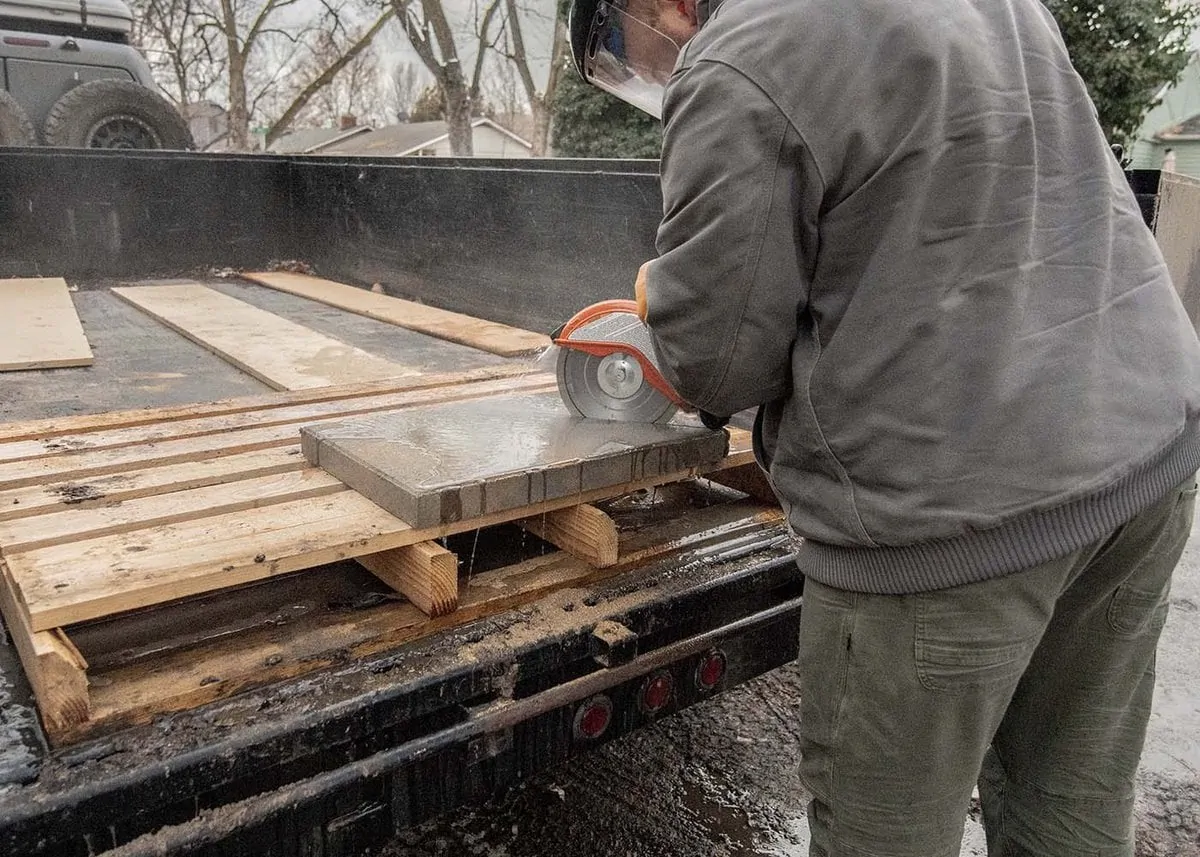
I was actually really surprised at how quickly the STIHL TSA 230 actually cut right through the concrete paver. The blade was quick to start right up and it was actually really nice to not have to get a gas motor going before I could start cutting. Aside from it being about 22 degrees outside, the experience was actually enjoyable.
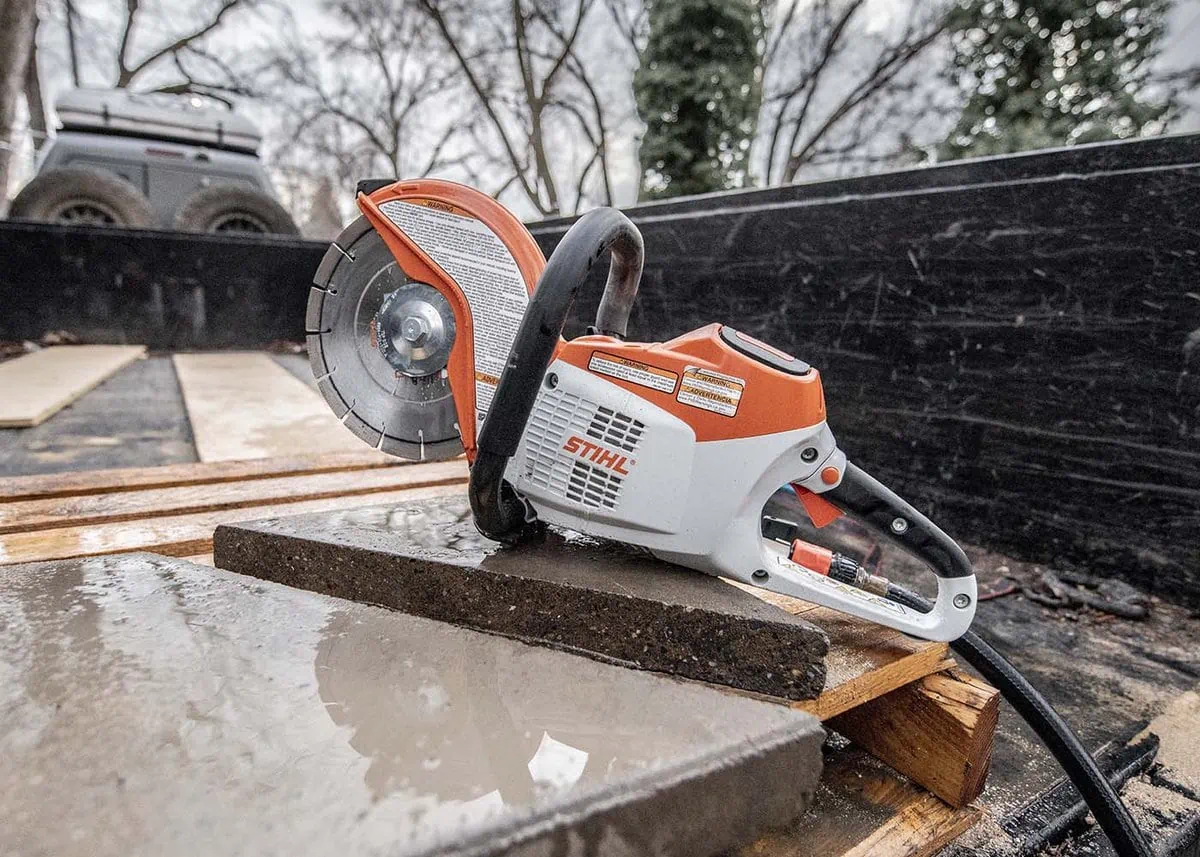
As expected, the STIHL D-X 100 Diamond Cutting Wheel cut a straight and smooth line. I would recommend a pair of waterproof chaps if you use one of these cut off machines but my kids decided it was better to just point and laugh at my “wet pants”. Either way, we got the job done.
The Perfect Paver Pathway
After cutting and placing all the necessary pavers, all I had left to do was add a few finishing touches to the pathway. I decided to add some simple solar path lights to help guide any guest to our front porch. This totally added to the charm of our cozy old home, and will definitely help keep down the amount of dirt and mud that the boys track into the house.
What style of pavers would you use in your own DIY path project?