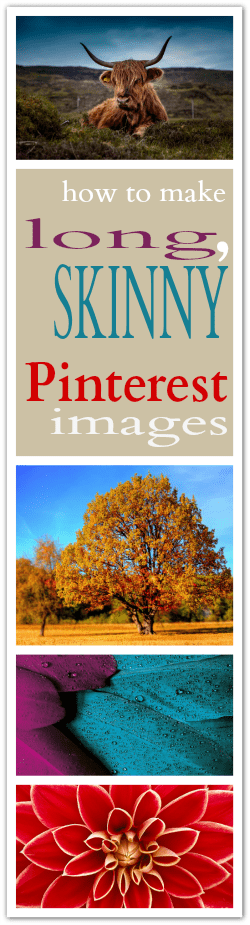
I get asked this question at least five times weekly. “How do you get your pictures long and skinny for Pinterest?” Pinterest is one of the biggest sources of new visitors to Someday I'll Learn, so I've worked hard to ensure that my content is optimized to display well over there. I now try to include at least one image in every post that is tall and thin since Pinterest resizes mainly based on width, not height, so my photos have a greater chance of being seen in the stream if they are skyscraper-esque.
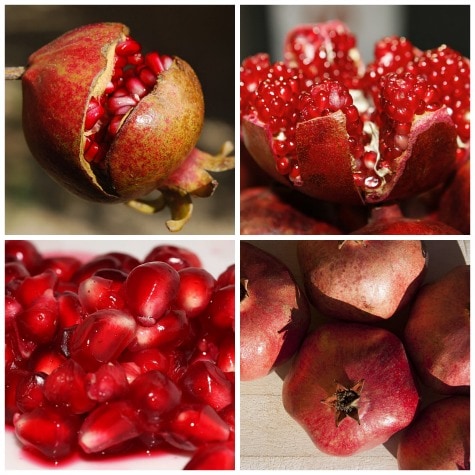
Start with 3-5 images related to your topic, and head on over to PicMonkey. Ahhh, PicMonkey, how I love you. Let me count the ways.
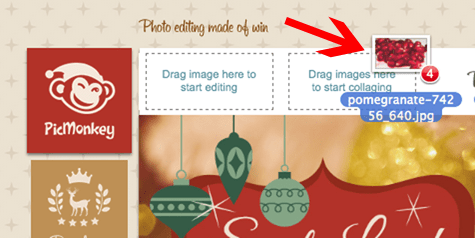
Drag your photos onto the upper box that says, “Drag images here to start collaging.”
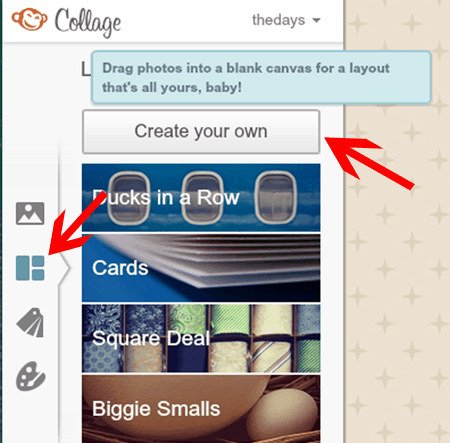
Select the collage configuration button (second from the top on the left-hand side) and click, “Create your own.”
One-by-one, drag your photos onto the canvas on top of each other in a long, vertical row.
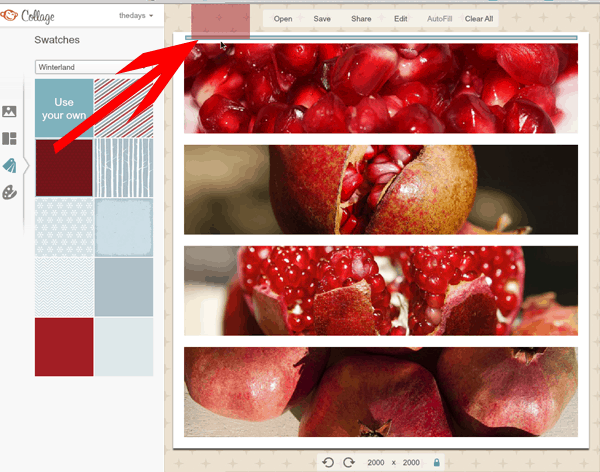
Click the swatch button (third from the top on the left-hand side) and drag a swatch onto your canvas. This will serve as the background for your text. I usually put my text title at the top or bottom of my row of images. Hint: You can skip this step to overlay text directly over one of the images. If you want a blank area for your text that matches the canvas background, drag a swatch over and then click the x in the upper right-hand corner to delete it, leaving an empty space.
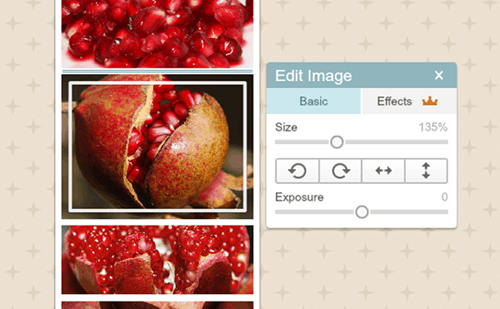
Drag the sides of your collage images to resize them or hit the “edit” button to zoom in or increase exposure on individual images.
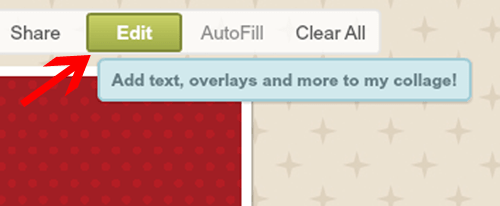
Select the “edit” button at the very top to add text when you're positive that your pictures are laid out perfectly.

Select your font and hit “Add Text” to add a text box. You can drag it around with your cursor, resize it, change colors, etc.
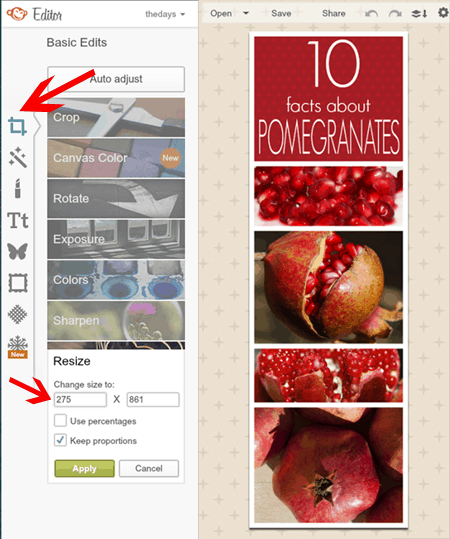
Select the “crop” button on the upper left-hand side and then select “Resize” to resize your image. I usually shrink mine to a maximum of 300 pixels wide when I'm doing long and skinny images, since it can be a pain to scroll endlessly on images that are bigger than that because they end up really long. Minimum width is 81 pixels for Pinterest and the length of your pin should be no more than three times the width, otherwise it won't display properly on Pinterest. Good rule of thumb: 230×690 pixels for pinnable images. Typical images for my site that aren't Pinterest compilations are 600-650 pixels wide.
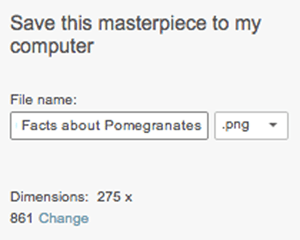
Rename it and save it as a PNG file. If you save it as a JPEG, the text will end up blurry. Only save images as JPEG when they don't include text. It seems you can also change the dimensions here as well.
Tada! Once you get the hang of the basic PicMonkey layout, you can add a ton of effects, borders, stickers and other cool doodads to your photos.
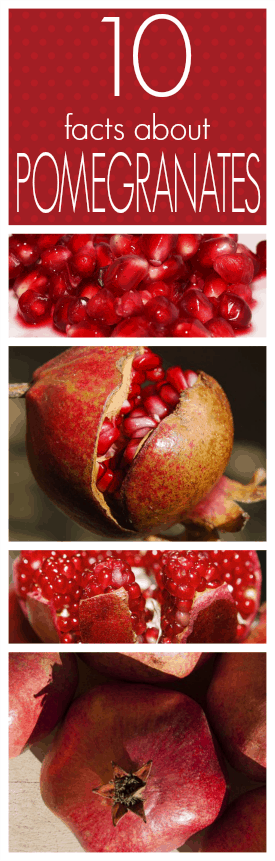
I don't know about you, but I'm kind of hungry for a pomegranate right now.
Thanks, Chelsea, for the great tutorial! I consider myself something of a PicMonkey “expert”, but I didn’t know about saving as a PNG image instead of a JPEG because of the blurry words! Genius! So, the “expert” learned something from your post today {grin}! Thanks again – great job!
I found this tutorial on Pinterest this morning, and I just want to say thank you 🙂 I never realized how simple it really is to make beautiful Pinnable photos with PicMonkey. I definitely appreciate that you took the time to write this post, especially for new bloggers like me!
Thank you! I never knew how to do this until now!
So you can do the same thing in photoshop basically. this is just a good way to do it if you dont have photoshop, or has anyone tried both ways and this is easier?