Looking for a straightforward Cricut how to? Are you intrigued by vinyl and machines – but don't have any clue about the steps to making a Cricut project? This is the detailed guide for you!
I've shared specific steps for all of my previous Cricut project ideas, but THIS? This is the overarching post to rule them all. A lot of our readers have followed my slow immersion into the Cricut universe as I've gone from itty bitty beginner projects to more advanced, multiple-step concepts involving multiple accessories.
If you're entering mid-stream, though, you may want to take a BIG step back and start from the beginning! Many readers have asked for an in-depth, concise Cricut how for everything from iron-on and vinyl to intricate wood cutting.
Below, I'll help you get your bearings and learn the steps to making a Cricut project. I'm including the most basic of steps for a Cricut project, all the way up to designing and creating whatever you can think up. Whether you're looking for an accent piece, a gift or a sign for your home, here's how you can get it done.
Choosing a Cricut Machine and Accessories
We've discussed Cricut machine options at length in our post Which Cricut Should I Buy? If you're an absolute newbie to the world of crafting, I adore the Cricut Joy for its simplicity and ease of use. If you envision a lot of home decor projects or a crafting business in your future, the Cricut Maker 3 is the one I'd go with.
Don't dig into the more complex wood, aluminum or felt projects until you have a good feel for simpler designs. Vinyl is always a great place to start, and I recommend beginning with removable vinyl in case you make a mistake in applying it the first time around.
Setting Up Basic Cricut Projects in Design Space
Cricut Design Space is where ALL the magic happens. This is where all Cricut users upload or create designs, and where they initiate the cutting process on their machines. This downloadable program is free to all users, and includes over 1000 images, 15 fonts, and many ready-to-make projects.
If you have a subscription to Cricut Access, you'll be able to access a vast library of over 200,000 images, over 500 fonts, and over 1000 ready-to-make projects. You can browse on the Design Space homepage to find ready-to-make projects that might be a fit.
Today, our Cricut how to is walking through how to make a project from start to finish.
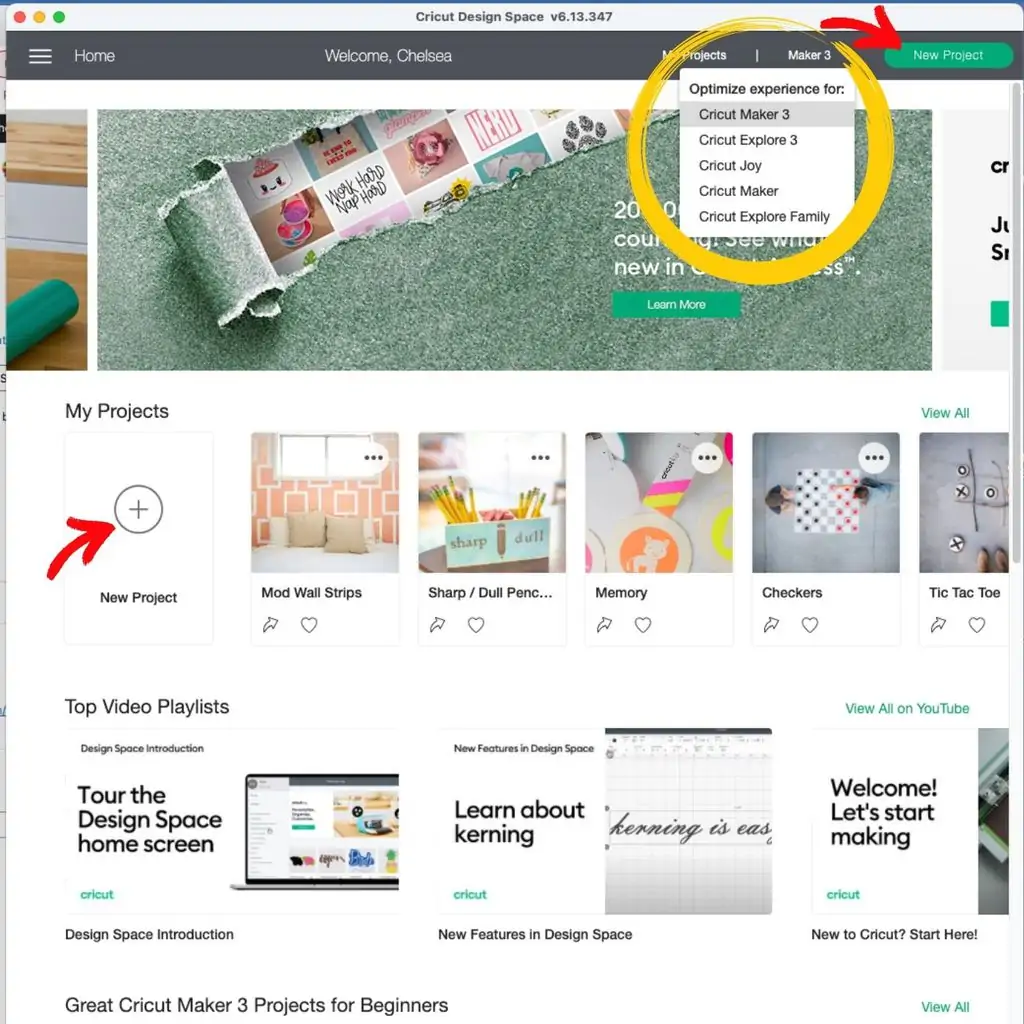
- Download Cricut Design Space, then open the program on your computer. Use the drop-down menu in the upper right-hand corner to select which Cricut machine you're using, and click “New Project” to create your own project.
- You'll be presented with a blank canvas. Select “Image” in the left-hand column. Search for any image you'd like. Select it and click “Add to Canvas” in the lower right-hand corner.
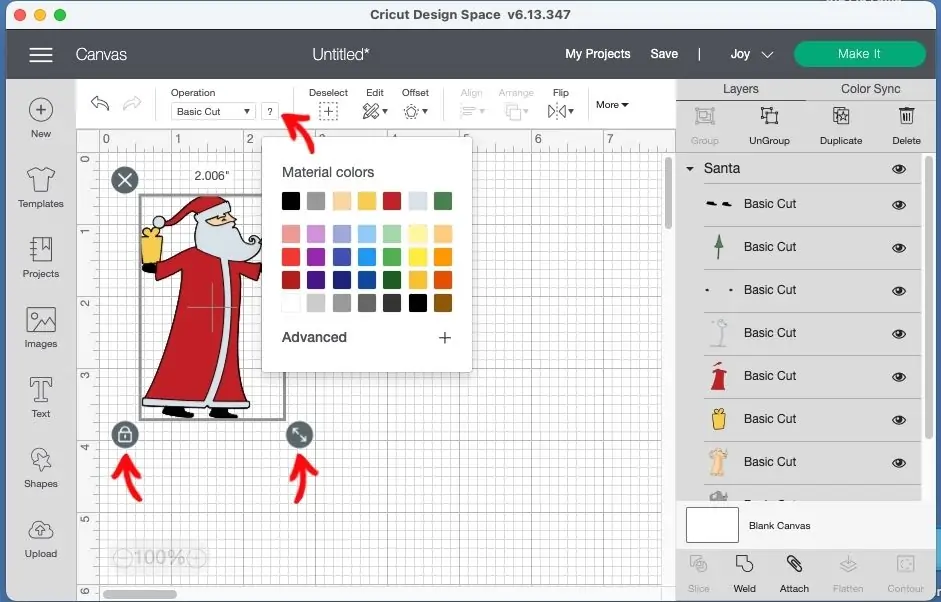
- If you go ahead and try to cut immediately, your Cricut machine will prompt you to load material mats for every single color in the image. That's a lot of layering. Let's simplify this image by clicking the question mark next to “Basic Cut” at the top, and select one material color.
- Resize the image to fit your surface by pulling on the resize handle at the lower right-hand corner of the image when it is selected. Clicking on the lock in the lower right-hand corner will unconstraint the image dimensions, so you can stretch it out if you'd like.
The numbers on the screen correspond to inches in the real world, making it extremely easy to think through how your projects will come to life.
Creating Custom Designs in Cricut Design Space
Now, let's say you don't see any images in the image library that are exactly what you want to print or cut. You could create a custom svg file with a computer program like Illustrator, but that's a lot of work and technical know-how. Let's stick with Design Space. Below, from left-to-right, you can see the progression of how I created a custom image by merging two images together using the slice and weld features.

- Create a new project by clicking the “New Project” button on the homepage, just like before. Find an image that's close-ish to what you want your project to look like. You can combine multiple images, and slice objects off or out of an images if they have components you don't like.
- Flip, rotate, and resize those images as desired.
- One way to remove parts of an images is to have two layers overlap, and then select both of them in the Layers area on the right. I simply added a square over my Santa hat to divide it into two.
- With both layers selected, click the Slice option at the bottom of the right-hand toolbar. You can see that you're left with lots of pieces from where the two layers were overlapping. Delete newly-formed, unnecessary layers by selecting them in the Layers toolbar and clicking delete, or right-clicking to delete them.
- Use the Contour tool in the bottom right to hide pieces of the now-cut image. Cricut will not cut or print hidden items.
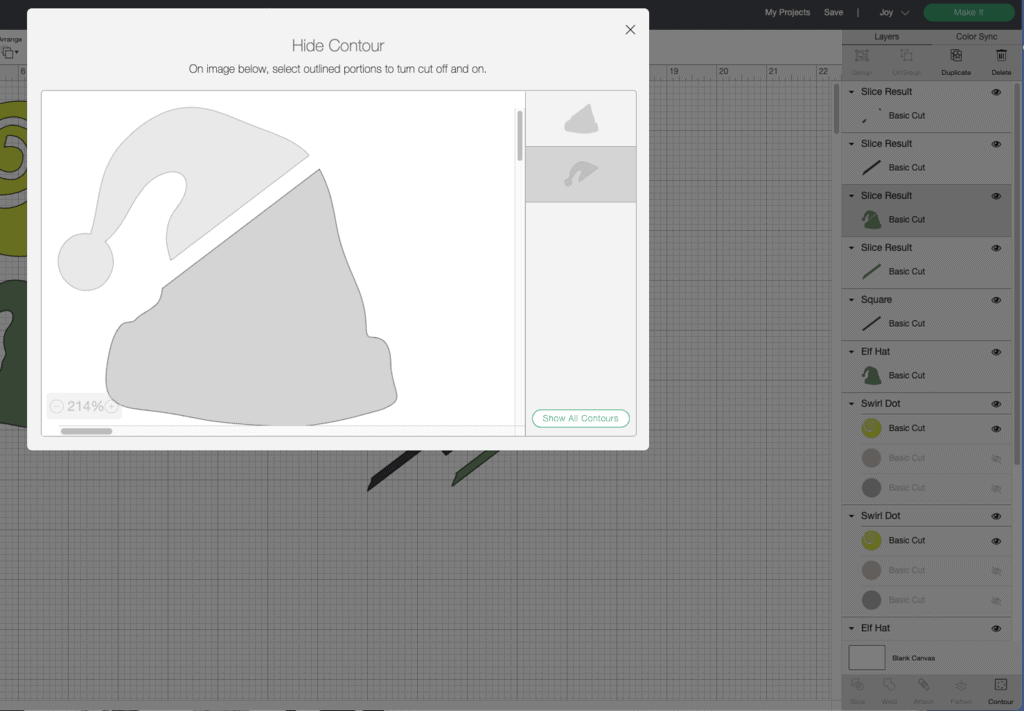
Now, we're left with an image that's simply the bottom of a Santa hat instead of the whole thing, I was able to push that layer up, overlapping the swirl, then Slice again to cut off the “tail” piece of my swirl. Just as before, I deleted newly-formed layers that were unnecessary, and used the Contour tool to hide pieces that I didn't want.
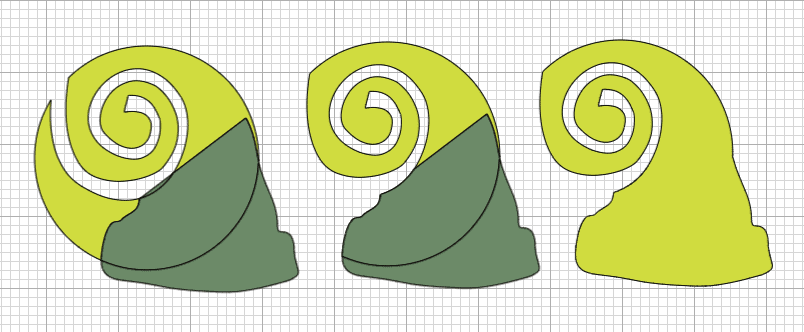
Finally, I selected my overlapping Slice results, and hit Weld in the lower right-hand toolbar to weld it together into one big, fancy, swirly Santa hat.
If you have a lot of layers on one Canvas while you're working, it's extremely helpful to Group them as you go, so you aren't accidentally dragging-and-dropping pieces of other design elements in the middle of other groups of design elements. When you start cutting or printing multiple objects in one swoop (for, say, a collection of ornaments or a set of coasters) this becomes crucial. Simply select all the layers in the Layers toolbar on the right-hand side, and click Group up at the top.
Attaching vs Flattening Cricut Projects
These two terms took me a long time to get straight.
- When working with a project that has items intentionally positioned near each other, you need to Attach all of the layers before cutting so that they cut exactly where you want them. This holds their position on the mat. Otherwise, the machine will save material by pushing items as close together as possible. I almost always attach, because I conserve space in my layout already and I like having things come out in the exact order that I expect.
- Flatten turns images into a print-then-cut image, so the machine knows to send the template to your printer before you load it into the Cricut machine. This is a highly specific use case, mainly for making labels. I rarely ever use flatten because my printer is not great. I prefer to use Cricut pens to write my text onto Cricut's label paper, then cut around it.
Choosing to Cut, Draw, Deboss, Score, Foil, Etc
Once you have your design laid out, you can easily switch from cutting to printing, perforating, scoring, engraving and more.

Simply click the toggle under “Operation” in the upper left-hand corner of Design Space. The options shown here will be limited to the machine you have selected, so if you aren't seeing what you expect you'll need to select the correct machine that in the upper right-hand corner of Design Space.
The Cricut Cutting (or Printing) Process
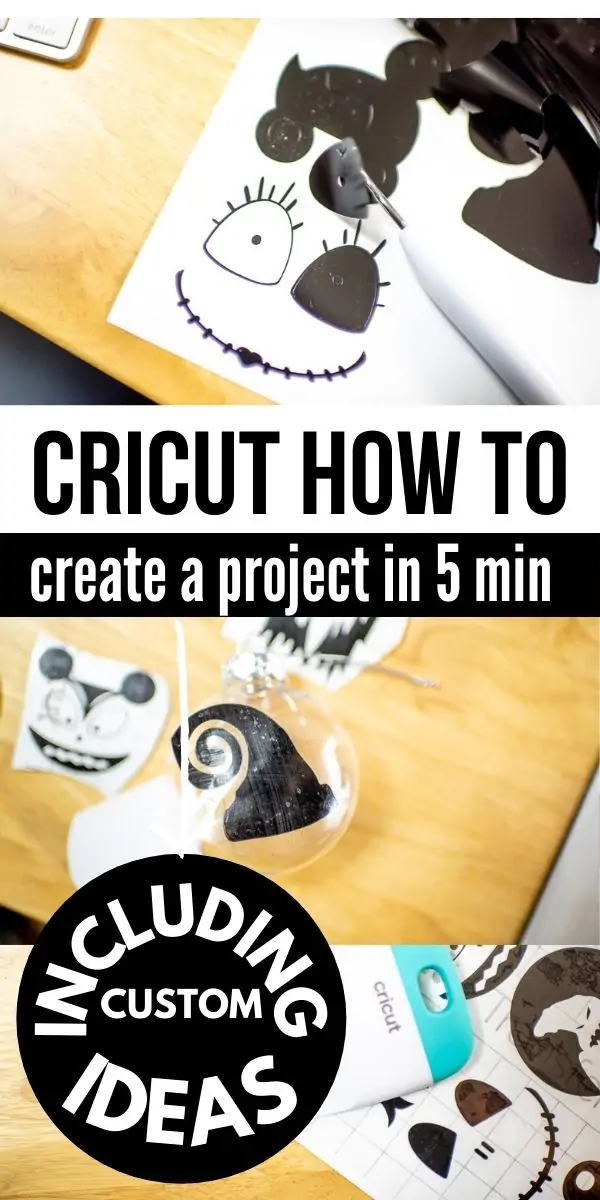
We're FINALLY ready to make our design! You can see below that I added my original Santa design into a whole Nightmare Before Christmas ornament theme, all of which I made directly in Design Space per the instructions above.
Make sure that your chosen Cricut machine is attached to your computer. This will be done either directly with a cord or via Bluetooth, depending on the model.
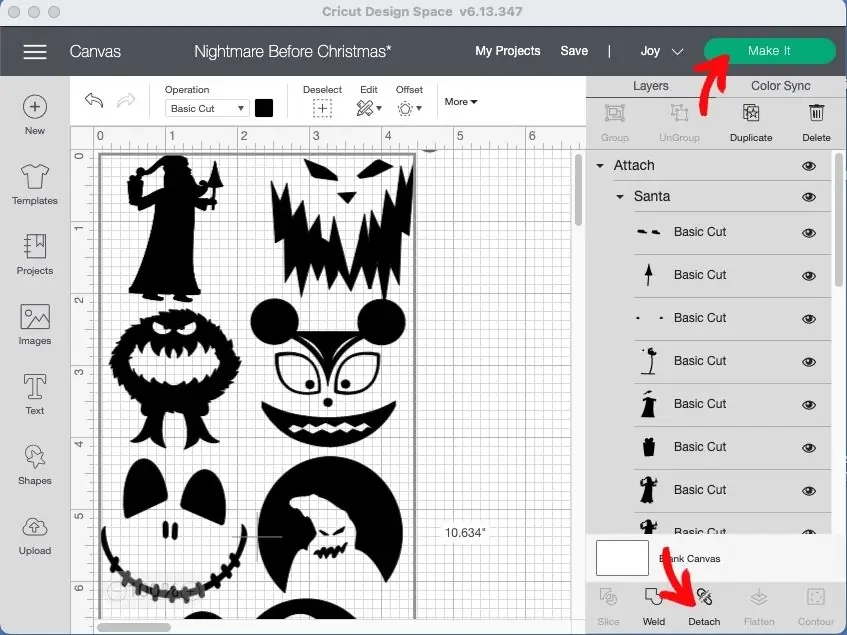
Make sure you've selected all of your layers and hit “Attach” in the lower left-hand corner if you want them to cut or print in place on your mat. This button switches to “Detach” if you've already attached your images. Then, hit “Make It” in the upper right-hand corner.
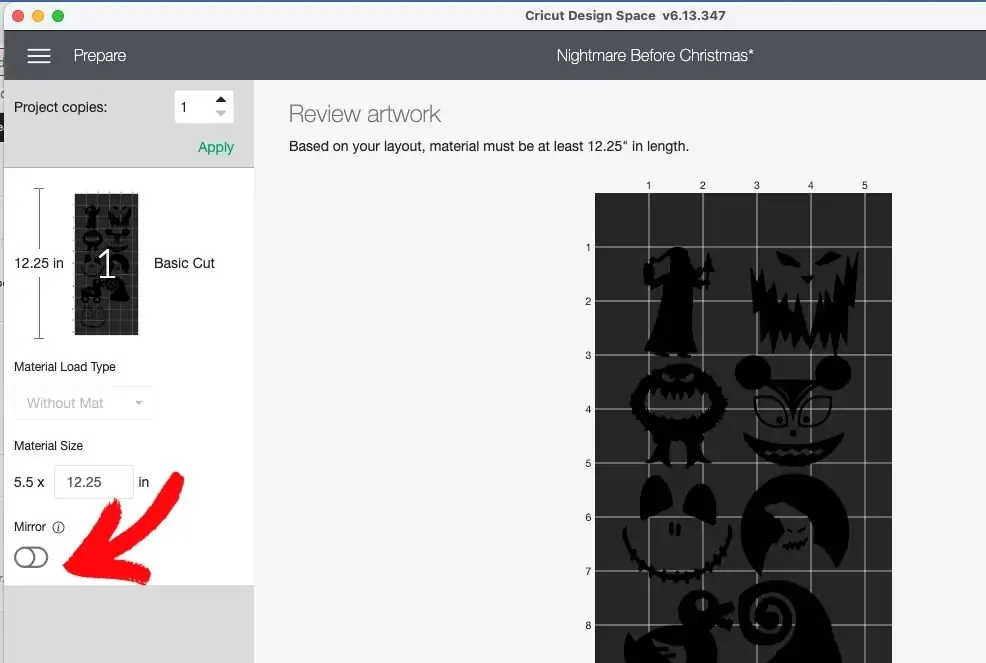
VERY IMPORTANT NOTE: On the next scren, you need to Mirror your project if you're doing iron-on or projects that are applied face-down, such as leather or Infusible Ink.
Hit Continue in the lower left-hand corner.
Design Space will prompt you to select your material, and then continue the project. It will walk you through inserting the appropriate pen or cutting tool, and loading material into the machine.
If you're using a Cricut Joy or Cricut Maker 3, you have the option of using Smart Materials, which do not require a mat. Otherwise, you will remove the plastic cover from your mat, align your Cricut material into the marked corners of the mat, and load the mat.
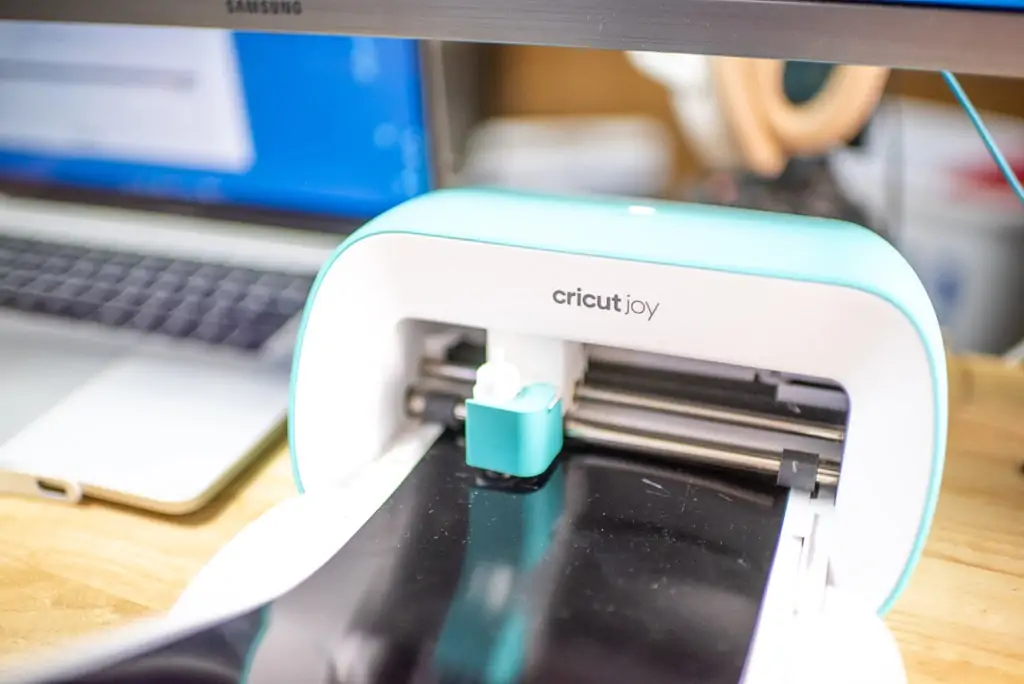
Voila! The Cricut machine will do its job. The most satisfying part about this Cricut how to is that this part is entirely hands-off. If you have a project requiring multiple tools or mats, Design Space will alert you with prompts taking your through each step.
Weeding and Applying Cricut Projects
For vinyl projects, you need to use a weeder tool to remove the vinyl that you do NOT want to end up on your project. Be careful to think through which pieces need to be removed, particularly for intricate projects. Now is a good time to go ahead and cut apart separate sections of your project. I cut each ornament design onto its own piece of transfer tape.
Next, cut transfer tape to size and apply it onto the weeded vinyl, using a scraper to affix it firmly. Gently pull up on your vinyl, transferring it onto the transfer tape, and then press it onto the final material. Using the scraper, press down on it again – with the transfer tape still on – and then remove the transfer tape.
Your vinyl is now on your project. Congratulations!
Iron-on, Infusible Ink and Mug Press Projects
These three types of projects have some specific requirements in terms of process and supplies.
- Iron-On: Pre-wash materials to be ironed onto, and prepare a flat surface for pressing. Don't forget to mirror your image before cutting, preheat your material, and follow the timeline in the heat guide. I've detailed instructions for Everyday Iron-On in my EasyPress post.
- Infusible Ink: Infusible Ink is a specialty Cricut product that infuses directly into specialty “blanks” including coasters, wine bags, shirts and more. Your work space needs to be completely free of any dust or debris. I have detailed instructions for Infusible Ink in my post showcasing our vacation shirts.
- Mug Press: The Mug Press is a specialty machine that infuses Infusible Ink onto mugs after cutting. I have detailed instructions for that in my post about the Cricut Mug Press Machine.
Did this Cricut how to help you out? Do you feel comfortable with the steps to make a project?